
Have you ever found yourself wondering how to record in PowerPoint?
PowerPoint is actually surprisingly powerful and there is a lot you can do with it. Turning a PowerPoint into video is super easy. In this post, I am going to tell you how to record narration into your PowerPoint presentations and export them as videos. As a bonus, we will talk about creating Animated GIFs and turning on the Record menu and ribbon in PowerPoint.
Recording your PowerPoint presentation videos only takes a few steps and it is not as intimidating as it sounds. Let’s start with a few reasons why you might benefit from recording your presentations and then jump right into how you do it.
Reasons to Turn Your PowerPoint Presentation into a Video
There are a number of reasons to turn a PowerPoint presentation into a video. I’ve done it a number of times for various reasons.
You may want to use a PowerPoint Video Presentation to…
- Make videos for creative ventures such as YouTube.
- Share business presentations to people that you cannot meet via Web Conference or in person.
- Generate a library of training videos for employees in your company or for students at your school.
- Practice and review your presentation skills to improve your future performance.
- Create looping slide decks to run on media players as a temporary alternative to digital signage systems.
- Loop a video presentation on a display kiosk.
- To create a small animated gif for a website or other destination.
As there are so many reasons to create PowerPoint videos, I figured that I would write a post on how to do it. Personally, I have used all the advice outlined in this tutorial. I have done it to create YouTube videos, practice presentations, create videos for kiosks, and to even create small animated gifs for this website.
Now, let’s get into how to actually do the recordings.
How to Record in PowerPoint
Just like everything to do with computers, there are multiple ways to get to where you are going. The easiest way is from the “Slide Show” menu. With some work, doing it from the “Record” menu is even easier. I will get into the “Record” menu further down in the article. Let’s start with the “Slide Show” menu.
Recording From the Slide Show Menu
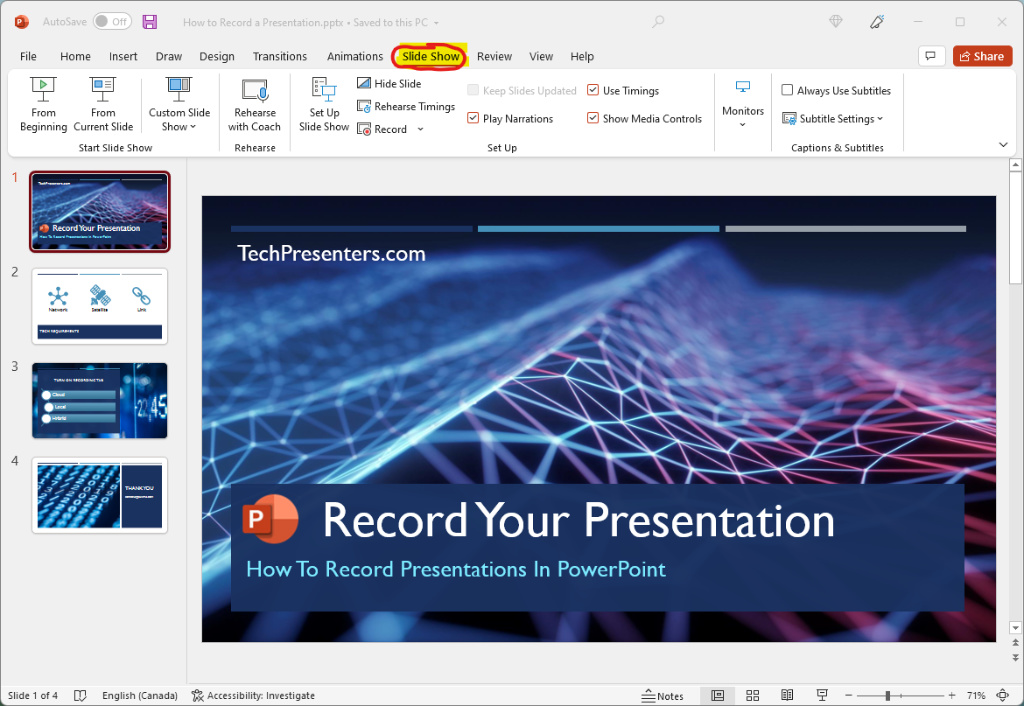
Straight out of the box, the option to record within PowerPoint might not be apparent. Below is how my PowerPoint program looked when I started this demo.

To find the record options, I go to the “Slide Show” menu.
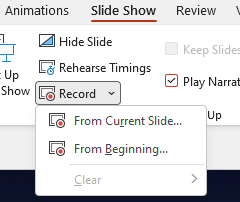
The first time that you record, it is good to start “From Beginning.” If you are practicing and reviewing, it is likely helpful to start from the beginning most times.
As you go along, you can choose to record “From Current Slide.” When you record “From Current Slide,” the previously recorded part of your presentation will remain unaffected by the new narration. When you complete the narration, you can export the video. More on that later.
Starting from the beginning and then going to whatever slide you messed up on and selecting “from current slide” is a great way to make your recording if you are okay progressively moving section by section.
The Recording Panel
When you start your recording, you will be taken to this panel. Using it is extremally straight forward. On the top left, you will find your record, stop and replay buttons. They do exactly what you would expect. The notes button in the top middle will show your notes. I go over that in depth in my article about how to use PowerPoint notes.
The “Clear” button gets rid of your recording on the current slide, or from the entire presentation depending on what you select. The “Settings” allows you to change your microphone and camera inputs.
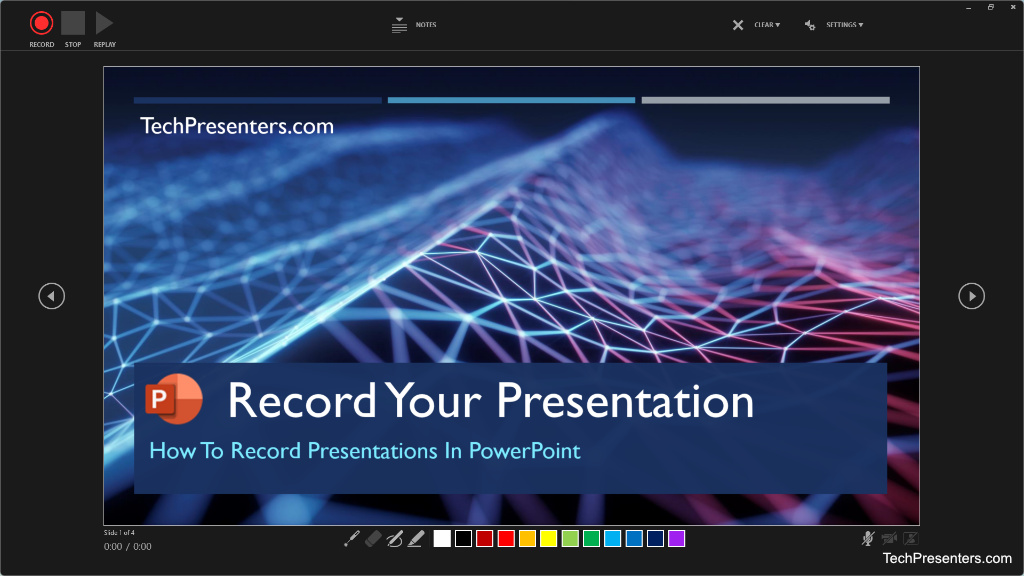
On the middle left and right sides, you have your advance and previous buttons. Along the bottom you have plenty of choices for annotation tools. Great if you want to do some digital whiteboarding or pointing out content as you go. Finally, we have buttons to mute and unmute your microphone, to turn on and off your camera and to display your video.
It is a simple interface, but also one that deserves practice as you perfect your ability to record within PowerPoint.
Saving Your Recording from PowerPoint
Once you complete your voice over and timing of the slides, make sure to save your work. You don’t want to lose everything in case something happens. It is always worth the effort to save.
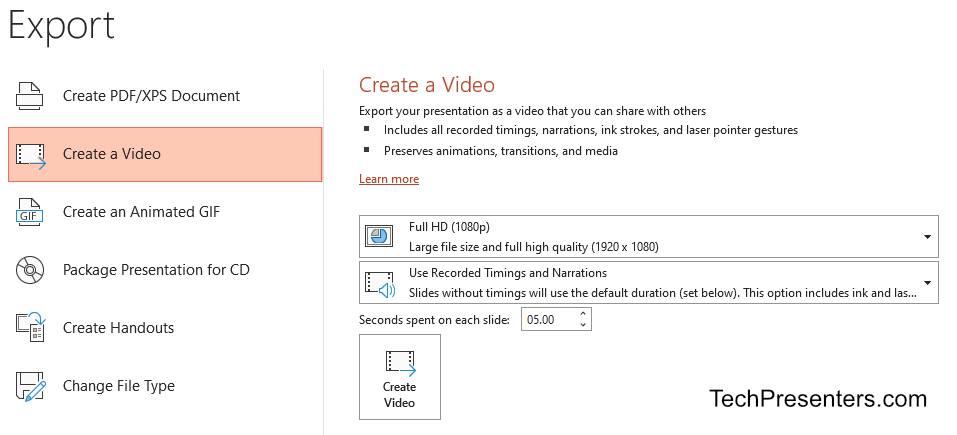
Exporting Your Recording from PowerPoint as a Video
you can easily export your presentation as a movie. You can then send that movie to wherever it is required – be that for YouTube, a company project or anywhere else.
As this is a computer program, there are multiple ways to do things, including how to export a movie from PowerPoint. To start, we are going to go with one of the most straight forward ways to do the task.
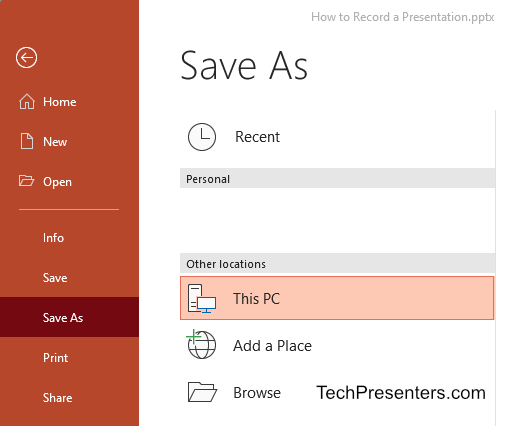
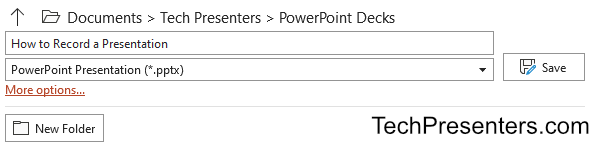
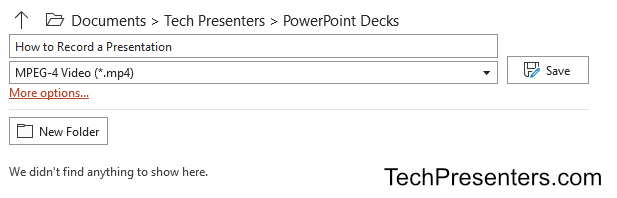
Method One – “Save As”
To export, go to the “File” menu followed by “Save As.” Then select a destination for the file.
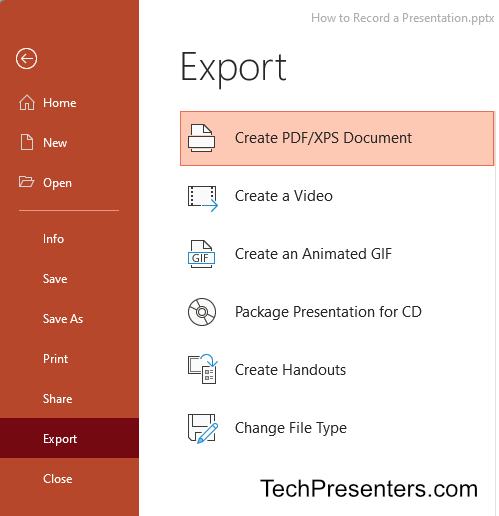
Method Two – “Export”
Now, to my favourite method and the one that I use in most cases.
This time, go to the “File” menu again but instead of “Save As” click on “Export.”
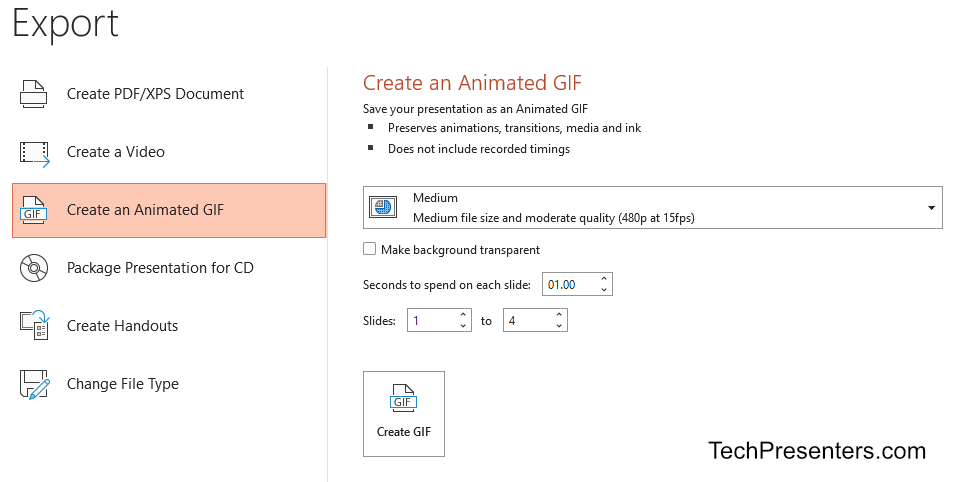
As a bonus, you could also use the Export function to save a PowerPoint Recording as an Animated GIF. This is great to make small visual for the web. I used this feature to create demo animations in my How to Make Bullet Points Show One by One in PowerPoint article.
Method Three – From the “Record” Menu
This third method is the one that I use the most, but it also requires a bit of work to set up. To be honest, it is a short cut to the “Export Video” option that we just talked about. The tricky part is that I had to add the “Record” menu to my PowerPoint program.
Having a Record menu with an export button did not happen by default in my installations of PowerPoint. Instead, I had to add that to the menu. We are going to go over how to do that down below.
Once you add it this menu in though, you get pretty much all of the functions that you would want to use for recording PowerPoint in one single spot. That is handy. Below is the new bar that we are going to add with the instructions below.

Notice that the above bar adds in a record button as well as the option to export the PowerPoint presentation to video. The buttons give you the same functionality as the record and export options that we already discussed in this article. The difference is that these buttons are easier to find.
So, how do we set up that menu and ribbon? let’s get into it.
Pro-Tip: How to Turn On Your Record Menu in PowerPoint
As a note, changing the menu in PowerPoint requires a few steps. It can be frightening, but I wrote out each step for you below. By following these steps, you two can add in the Record menu to your PowerPoint Program.
Step 1: Click on “File”
Start by clicking on “File” in the top right corner.
Step 2: Select “Options”
Once you enter that, look at the very bottom left of the screen.
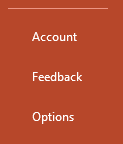
Select “Options.” This is going to open up a new menu box.
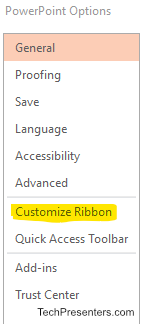
Step 3: Select “Customize Ribbon”
Looking at the new menu box, the list on the left are the categories of settings that you can change. Look for “Customize Ribbon.”
Step 4: Put a Checkbox Mark Beside “Record”
On the right hand side, look for the word “Record.” Click on the empty box beside it. You want to turn that white space to blue with a check mark on it. This will turn on the menu option once you hit okay.

Step 5: Select OK
Once you have the blue check box beside “Record,” select OK. This completes the process and you will now have the Record Menu tab and the items included with it. Below is what you will see when you click on it in PowerPoint.
If you desire to undo the option, go back into “Customize Ribbon” and turn that blue check box back to an empty white square and then select OK. I am not sure why you would want to disable the menu though as having it there makes recording videos in PowerPoint so much easier.
Speaking of recording videos, this menu bar also gives you the option to do a “Screen Recording” and insert that into a slide. It works great. You can use “Screen Recording” to make narrated screen capture videos of software demos and whatever else is on your screen very easily. While I am not going into Screen Recording, Microsoft has an excellent resource page about that. You can find it here.
My Use of PowerPoint
My primary use of PowerPoint is as a support technician. Generally I am the person offering advice to those making presentations and making sure that presentation works with the room and streaming technology for the audience. Over the years, I applied my PowerPoint skills in the business, academic and artistic markets.
Many people don’t realize how powerful PowerPoint actually is. Some nontechnical people attempt to use OBS for screen captures not realizing that PowerPoint already has a handy built in tool for this function.
Many people also don’t realize that the newest version of PowerPoint allows you to display a video of you in the bottom right of the screen by turning on the camera option. In essence, you could make training and pre-recorded presentation videos with you in them using this feature. Some people don’t even realize that you can make videos with the program at all.
I am hoping that this article will help make things easier for those who want to know how to record in PowerPoint.
In addition to supporting PowerPoint for in-person and virtual events professionally, I also use the program as a hobby content creator. Below are some samples of that content. All of these samples videos I made with PowerPoint.
My Hobby Videos Made With PowerPoint
As I mentioned in my article about free video editing programs, I was honestly very impressed with how much you can do in PowerPoint to produce videos. If you read my other articles on this site, you may know that I also run a gaming channel on YouTube. It is an artistic outlet for me that I run for enjoyment purposes. Despite YouTube being a hobby for me, the videos perform very respectably and I am happy with the content I produce.
I made all of my early YouTube videos using PowerPoint. It is so easy to create narrated slideshow videos using this software.
When I started, I made my videos with no other software. Narration, images, and transitions are all right there in PowerPoint. Once I made the videos in PowerPoint, I would add in music using the editing tools on YouTube.
As I improved my craft, I would record the videos (narration, slides, transitions and all the visuals) in PowerPoint, add in music in Audacity and then swap the audio file from the original video with this new one using OpenShot. This approach is more complex, but gave me more control over the sound. It also yielded good results on YouTube.
Since then, I moved on to using Audacity and DaVinci Resolve as my main editing and creative programs of choice. That said, I still have a library of videos that I created using PowerPoint. Although the subject matter of the videos might not be up your alley, let me share them with you.
The first sample is a review I made of a popular tabletop game starter set. If the embedded video below does not work, you can use this link.
Next up, a narrated tutorial of how to paint miniatures. I used animation within PowerPoint to circle items during the presentation. If the video below does not work, check out this link.
This next one a lot of people enjoyed and gave it a thumbs up. If it does not work, use this link.
In this one, I show off a board game that I own. If the video below does not work, use this link.
The videos above are but a small sample of the ones that I made with PowerPoint. Each video that I make gets better than the last. If you are interested in checking out more of my videos, you can take a look at my Hobby YouTube Channel.
Now, let’s draw this article to a close.
Bringing it Together…
In this article, we went over how to record in PowerPoint. The reasons you might want to do this are many. A product demo, practicing a presentation, a looping video for digital signage are all good potential reasons to record your PowerPoint presentations. Perhaps you want to use PowerPoint to create videos for YouTube. It works well and can yield good results.
Throughout this post, we talked about how to record your presentation in PowerPoint and how to export that recording as a video. On top of that, we also covered how to add the Record menu to the PowerPoint editor.
Finally we wrapped up with some sample videos that I created using PowerPoint.
Hopefully this post will help you with whatever project you are working on.
Until next time, Happy Presenting Everyone!!!

