
Ever find yourself wondering how to make your bullet points show one at a time in PowerPoint? Perhaps you want to fade out your bullet points to a different color. In this post, we are going to go over exactly that.
When it comes to PowerPoint, there are multiple ways to do everything. In this article, I discuss how to better reveal your PowerPoint bullets. This is a quick tutorial on how to animate your points to come in one at a time and how to fade them out (or dim them) when you move to the next.
To make it easy, I started with a template, but this is super easy to do from scratch too.
Now, let’s get started.
Getting it Started – Adding Bullet Points in PowerPoint
I really like bullet points because they convey information quickly. Also, once you use a bullet point, no one cares if you use complete sentences. In fact, it is encouraged. Use your bullet points short to emphasize your spoken presentation rather than your PowerPoint deck.
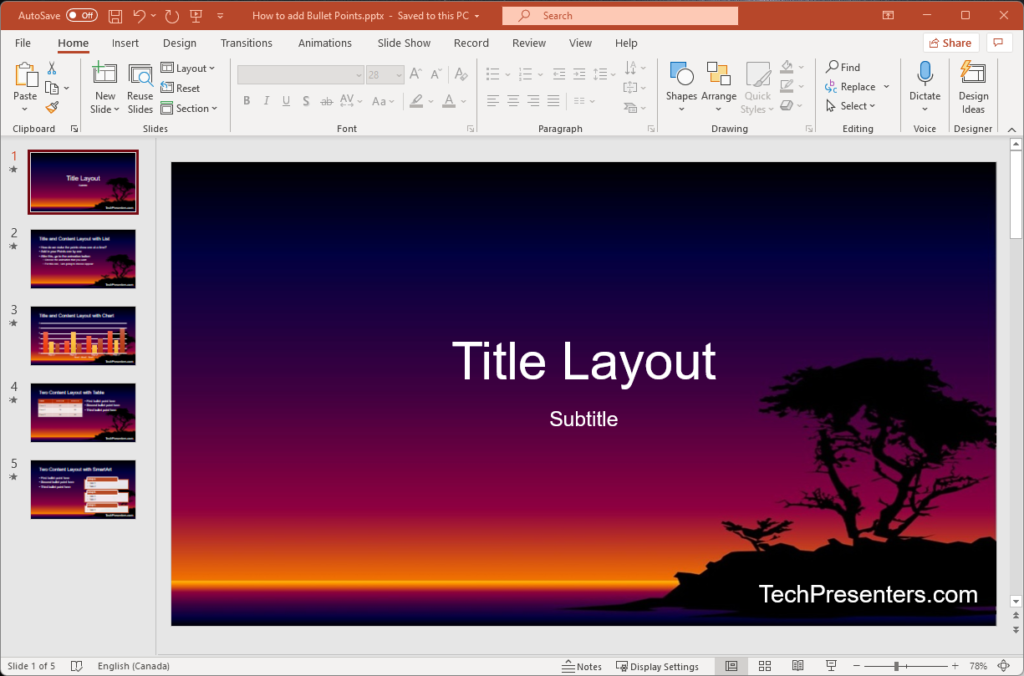
The first thing that you need to do is to create a presentation. For ease of use, I went with a template.
Now, if you don’t use a template, you can easily create bullets in an already existing text box by going to the “Home” menu. There you will find the Bullet Button for your paragraph (or text box). This will create an organized list of bullet points for you.
If you don’t already have a textbox, you can find the textbox under the “Insert” menu.
We are going to skip the above information because we fast tracked this presentation with a template.
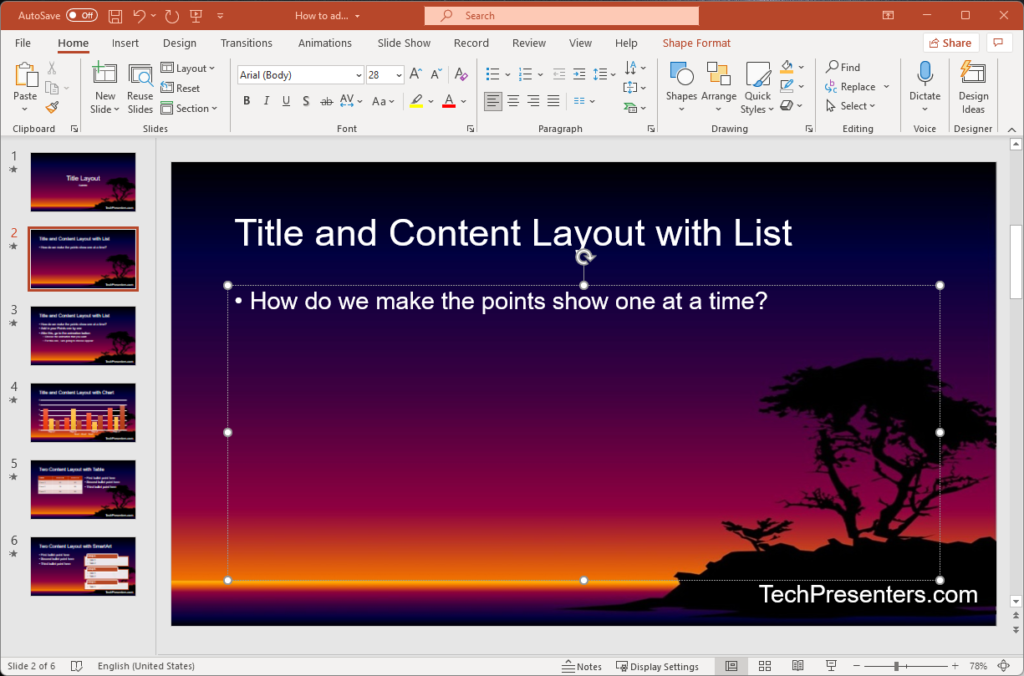
Once you get your list of bulleted points, it is time to figure out how to make them appear one at a time.
How to Make Your Bullet Points Appear One at a Time in PowerPoint?
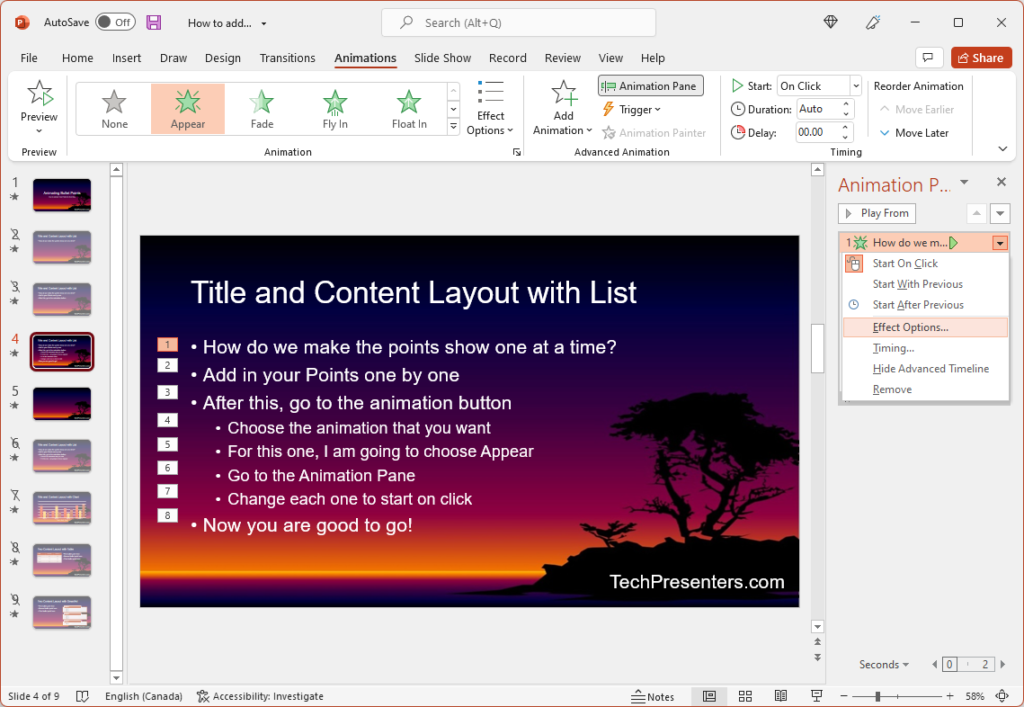
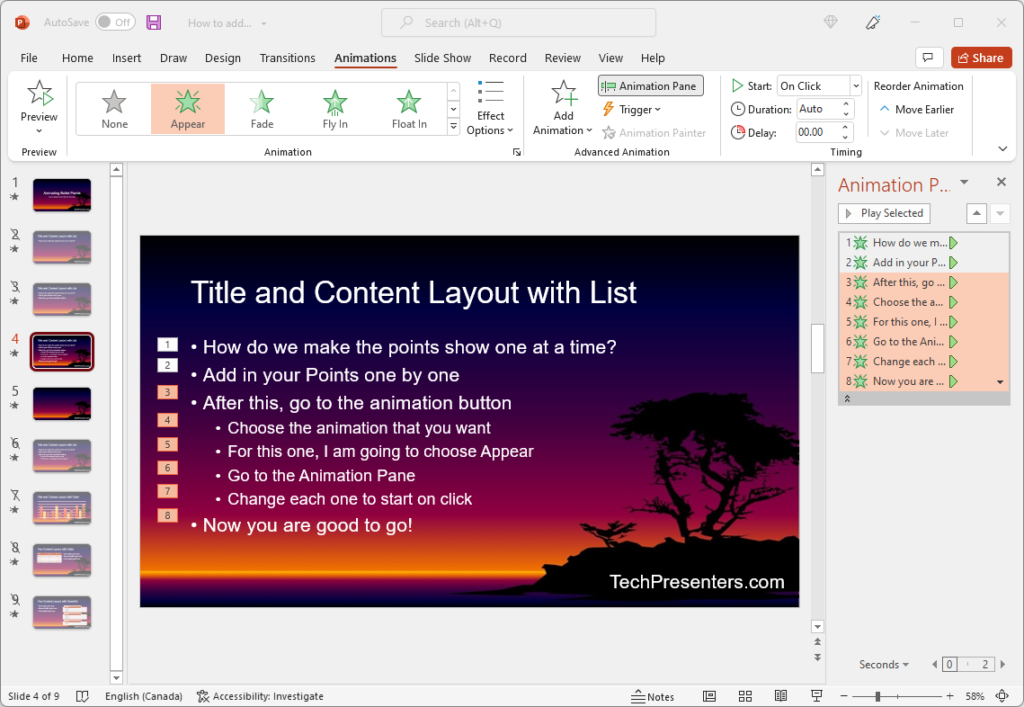
To get the bullets to appear one at a time, simply go to the “Animations” menu button at the top of the program. With the text box highlighted, select the animation that you would like to use for your PowerPoint bullets. For this demonstration, I am using the “Appear” animation. Of course he can choose a different animation, but I chose the “Appear” one because I feel simple is best.
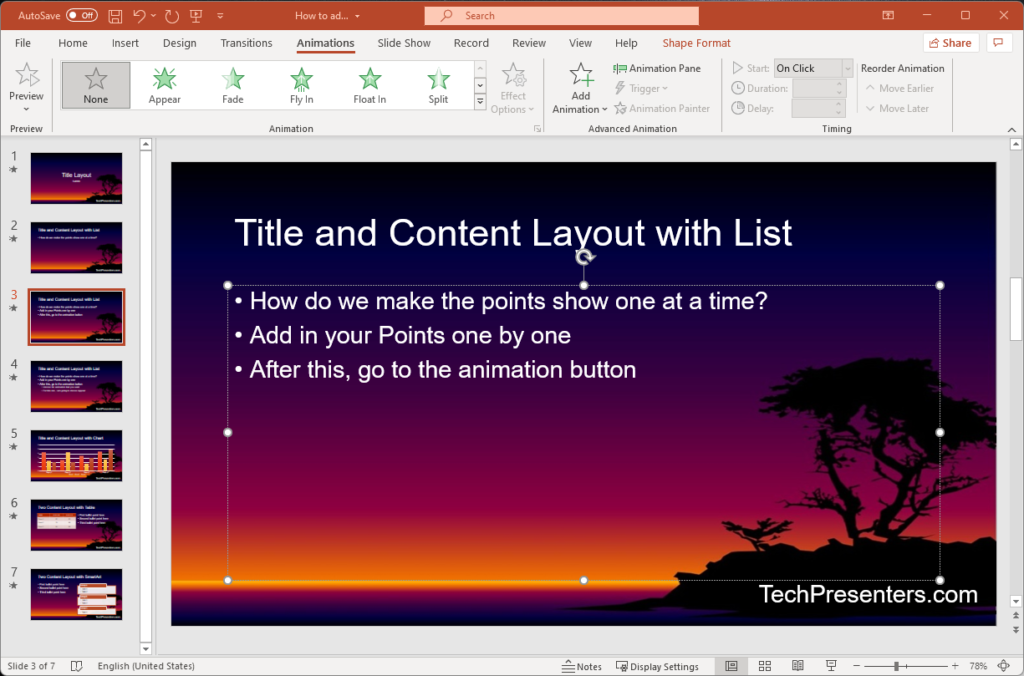

Once you apply the animation to the bullets textbox, you will see numbers appear on your slide. These numbers indicate in which order your points will appear. Look at the third point. It and all of the subheadings appear at the same time as indicated by the number “3.” I will show you how to change that.
Below, is an Animated GIF of the presentation so far.

How to Make Bullet Points Show One at a Time in PowerPoint – Dealing with Subpoints
To change how the points show, click on the Animation Pane under the “Animations” menu.
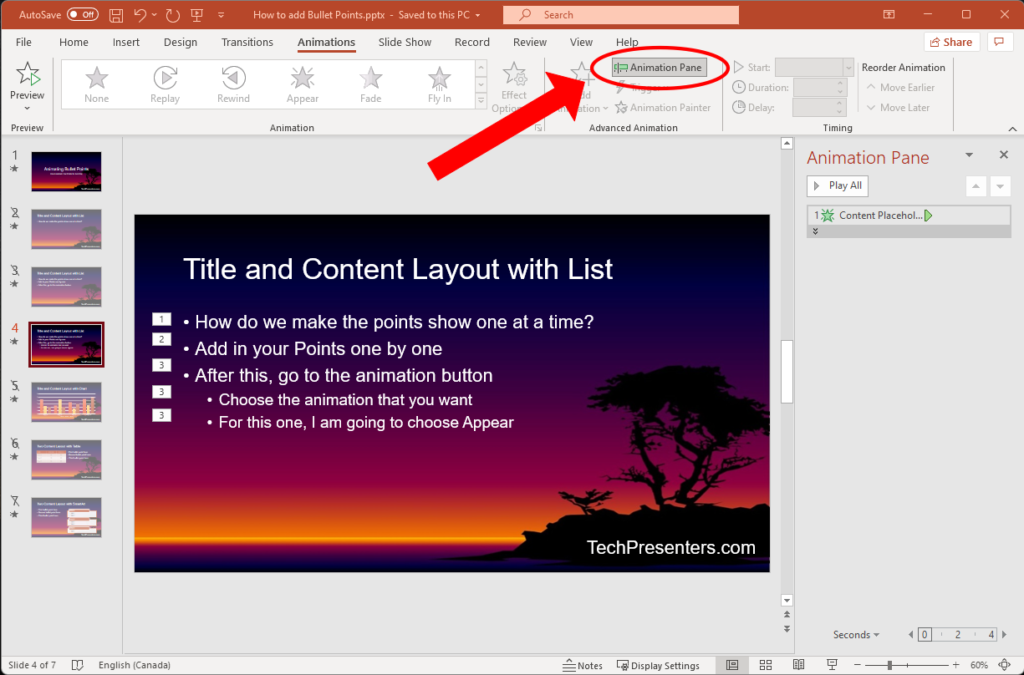

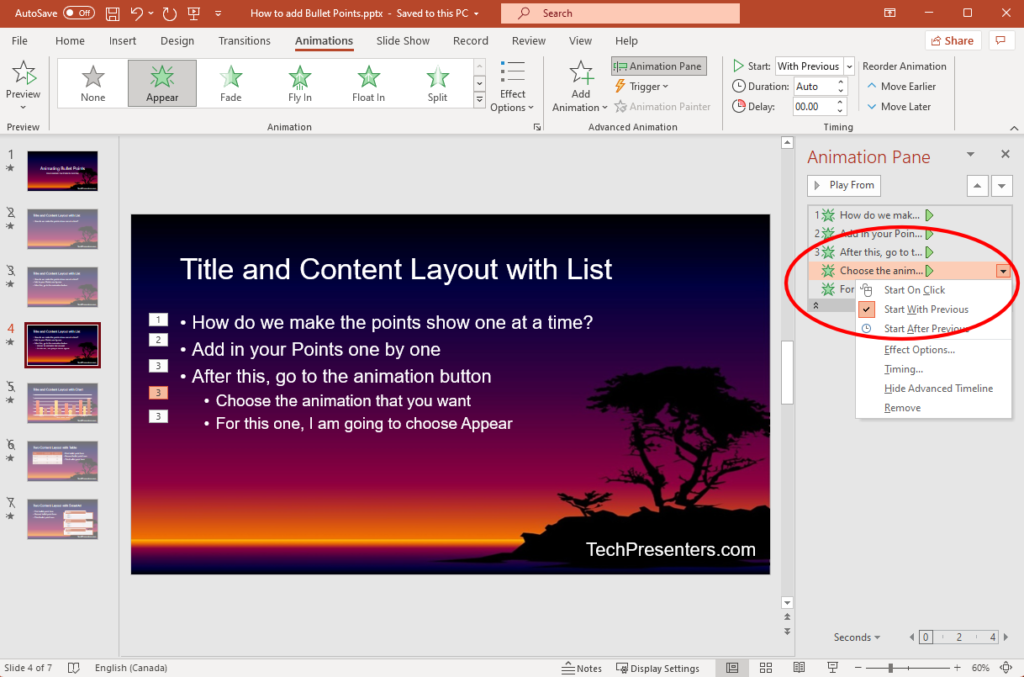
If this seems tedious there is a tip near the end of the article on how to do the above step faster. Hint… You can apply changes to more than one of these animation steps at a time. I just wanted to keep it simple for this part of the tutorial. Let’s take a look at how the Animation Pane looks after this step.
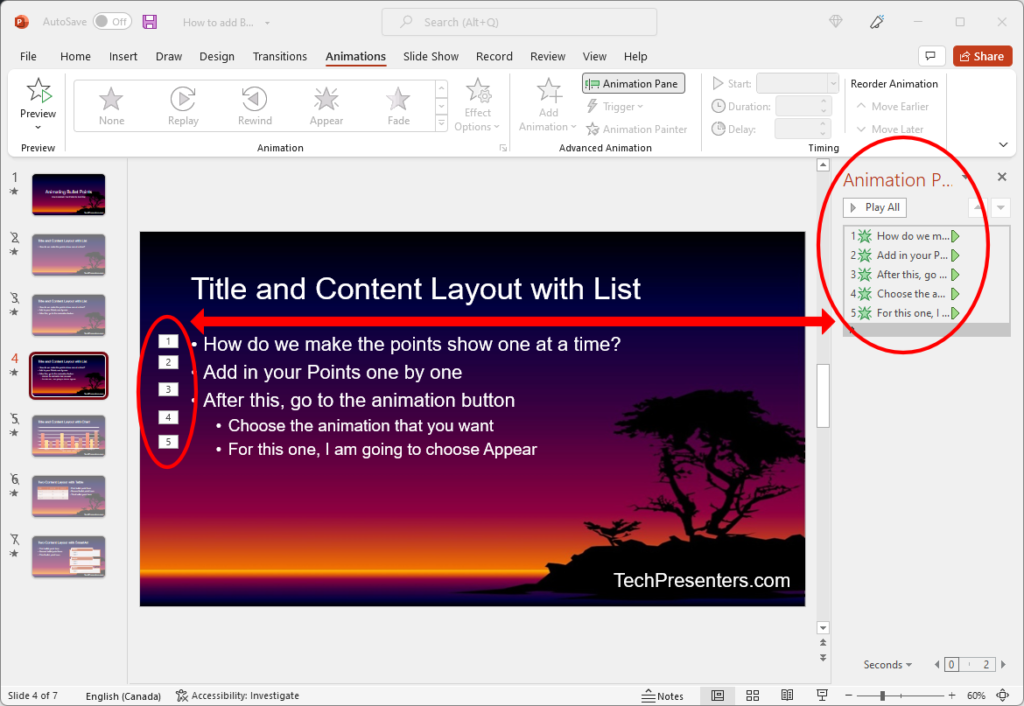
Let me add a few more points to this slide and make the above change to each sub-point.
The animation below shows you the presentation after changing it so all of the points show one by one.

That is how to show your point form bullets one by one in PowerPoint.
PowerPoint automatically took care of the normal points for me when I applied the animation. That said, it shows your subpoints with the point above it by default. You can change this so they appear one by one under the main bullet point.
Now, let’s take it a step farther and talk about how to fade the bullet-points out as new ones appear.
How to Fade Points After You Talk About Them in PowerPoint
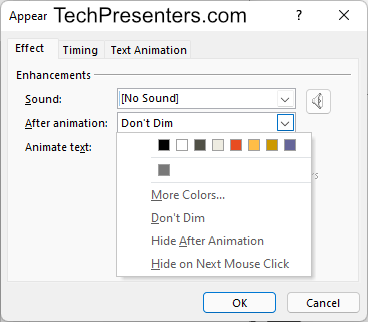
Your PowerPoint deck should be about guiding the audience’s attention. The slides should not show your script to the audience or be something that overwhelms your audience with too much information. If you want to hid your script in a PowerPoint file, I have a post about that. But right now, let me show you how to further guide your audience’s attention by fading out (or dimming) your PowerPoint bullets when the next one appears.
When you dim, or fade out, your bullet points, you encourage your audience to focus on the point of your discussion! This is so easy to do and many presenters do not take this step.
In the past, some people would create one slide for each point and change the colors of the point not being discussed. That is one way to do it. But it is a very manual process – especially if you want to change something after the slide deck is created.
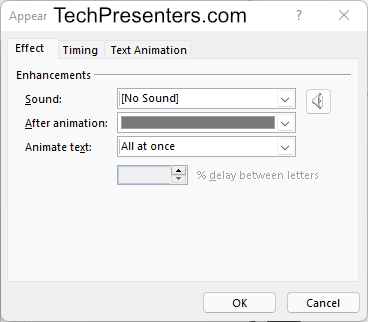
It is easier and quicker to dim your points through the “Animation Pane.” Check this out!

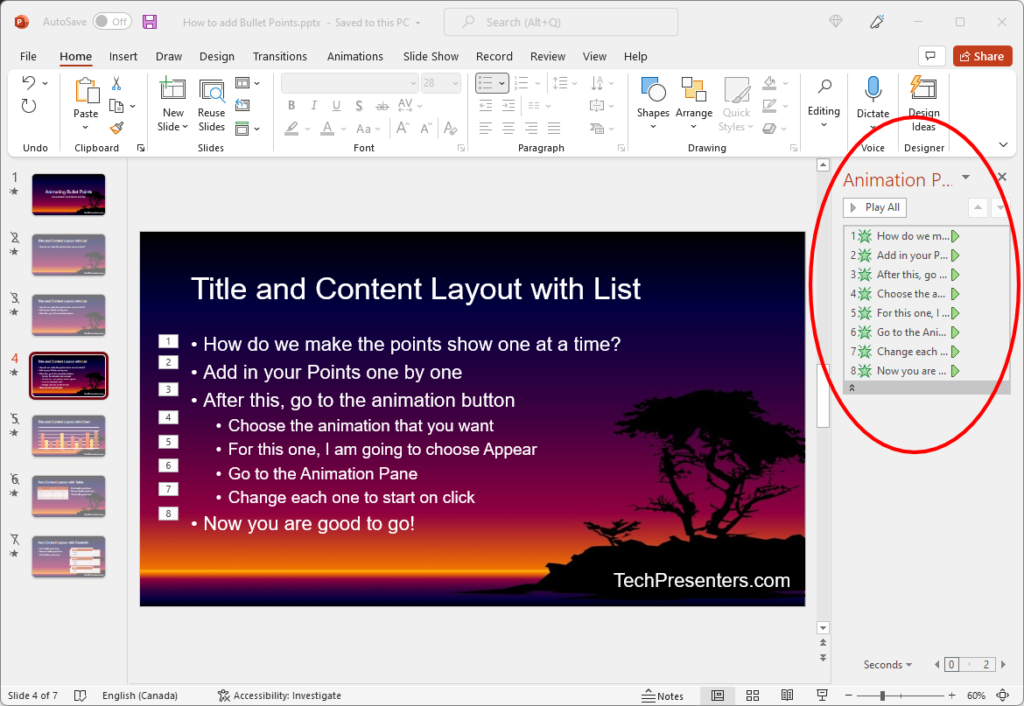
Repeat this process for each point. Again, there is a tip below to do this procedure faster.
Below is a demo of the presentation at this point in time. Notice this dimming out of your points guides the eye during your presentation. This will help keep your audience’s attention focused on the point that you are discussing.

Pro Tip – Doing Changes to Multiple Bullets at Once
In the two tutorials above, I wet through how to make the changes one by one. That said, you can apply the changes to multiple animations all at once. For more advanced users, or users that have a lot of slides to work on, this is a great tip to know. Just select multiple items in the animation pane and click on the drop down arrow at the bottom right of the selection.
When you make a change to the animations this way, it will apply to all of the selected animations.
Knowing this will help make you work in PowerPoint faster. Nothing wrong with that at all!!!
Bringing it together…
In this post, we went through how make your bullet points show one at a time within PowerPoint. On top of that, we also discussed how to fade your points out after you discussed them. With these two pieces of information, you can really help guide the attention of your audience better through PowerPoint. This will put you well ahead of many other presenters out there.
As a meeting support worker, I find that the main issue that many people encounter with PowerPoint is that they try to show too many items per slide. This leads to information overload and what many call “Death by PowerPoint.” By combining the tips in this post along with the ones in my earlier post about how to hide your PowerPoint notes, you can really step up your presentations.
Hopefully you will find this information about how to make bullet points show one at a time in PowerPoint useful.
For those wondering, I use Microsoft Office 365. If you are running these presentations for large groups of people, I recommend you check out The Hottest PowerPoint HotKeys for Presenters. That article will give you tips on a bunch of useful hotkeys to make navigating your presentation faster.
Until next time, Happy Presenting Everyone!!!


