Do you have a presentation to make and find yourself wondering how to add notes to PowerPoint?
Adding notes to your PowerPoint Presentation is a simple and effective way to make presenting easier. In this article, we will go over how you can add notes to PowerPoint, tips on using those notes, and how to print some fancy PowerPoint notes.
Now, let’s get right into it!
Why Would I Want Notes in my PowerPoint?
PowerPoint Slides are not meant to be your script. They are meant to enhance your message and help guide the attention of your audience. Generally, you want the audience’s focus to be on you and your spoken word – not your slides.
The temptation for many first starting with PowerPoint is to place all of the information they need to discuss on the slides. The problem with this is that the audience begins to read your slides and lose concentration on the words from your mouth. When the audience reads your slides ahead of you, they often lose their interest fast and their attention is split between your words and what is on the slide.

PowerPoint gives you a simple way to add notes to your slides that your audience never sees. These notes are there to help you so you never have to use your presentation deck as your script. Instead, you the notes section.
So, how do we add notes to PowerPoint?
How to Add Notes to PowerPoint
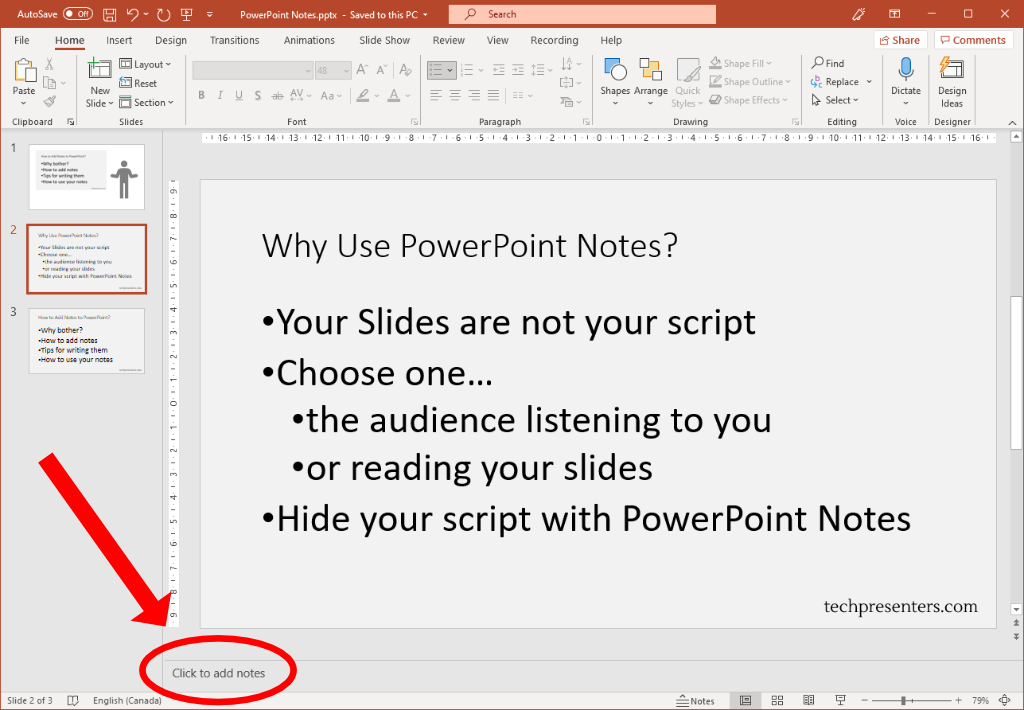
Microsoft made adding notes to PowerPoint extremely easy. All you have to do is go down to the bottom of the screen where it says “Click to add notes”. Once you click there, you can add in your notes for the presentation.
I recommend that you use this for a point form. For my videos made from converted PowerPoint files, I like to write my full script there. I have also seen marketing, communications and presentation professionals use this space for stage and technical directions too.
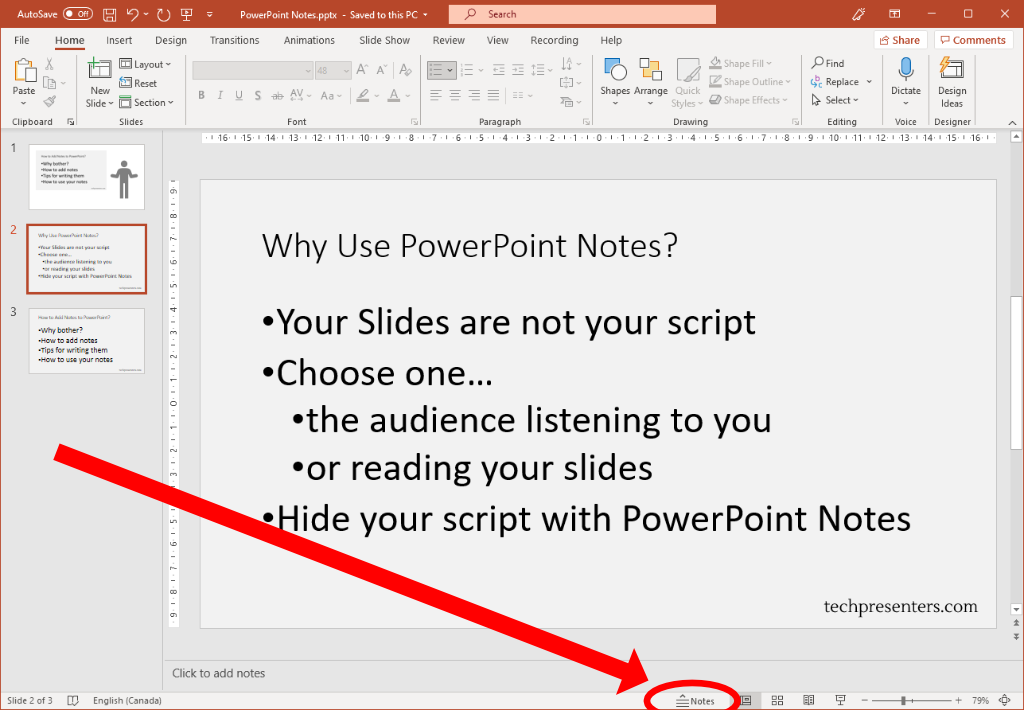
What to do if you Don’t See the Notes Section
If you don’t see the notes section, there is a little tab at the bottom of the screen that you can click to make the notes appear.
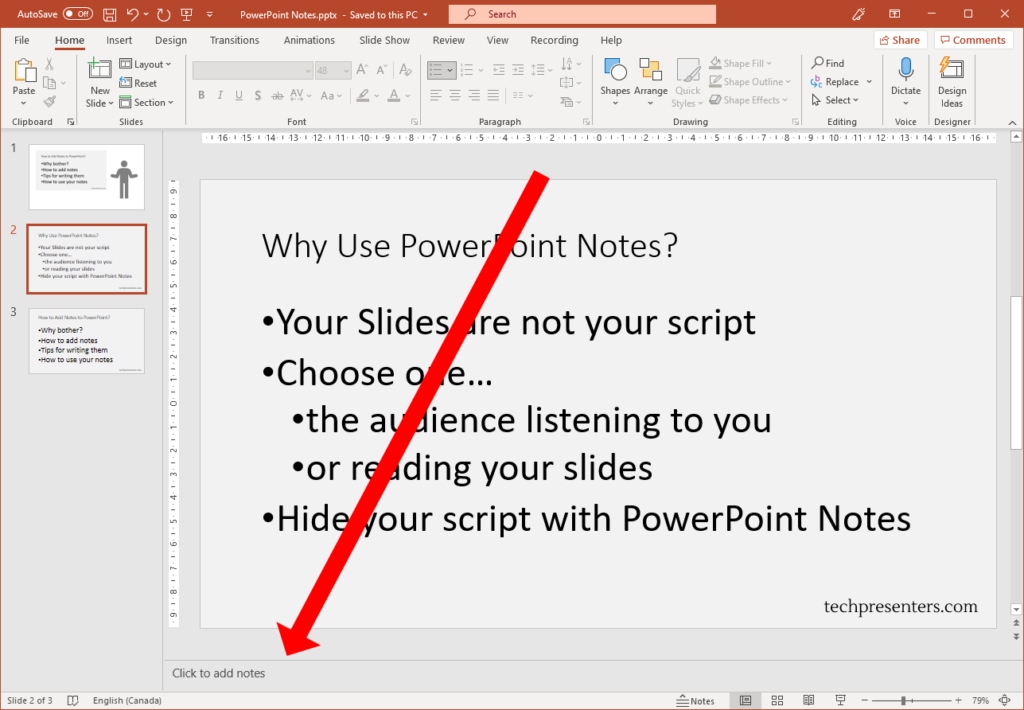
I want to point out that the you can adjust the separating bars between sections. You can change the size of the notes area by hovering over the line and then clicking, holding and dragging that line to resize the area.
Different Views and Adding Notes
Speaking of different views, you don’t need to write out all your notes on the default slide design page (also known as the “Normal” View). You can also access these notes in the “Outline View” and the “Notes Page” too.
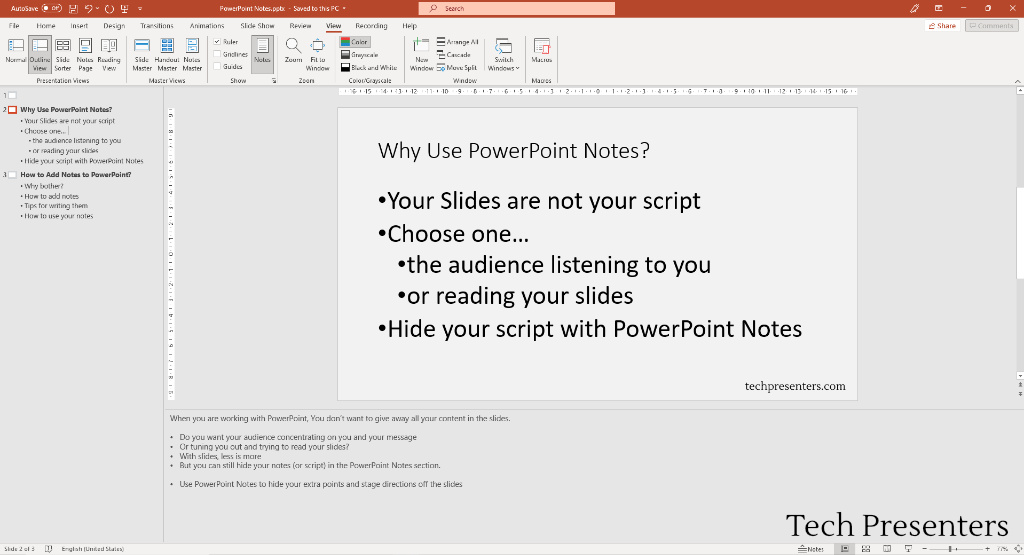
Personally, I like editing my notes in the “Normal View”. Remember that you can resize your notes window by hovering over the bar above it. When you see the two sided arrow, click and drag to resize the window. That will give you ample room to edit your notes while viewing your slides. The “Notes Page” is also a good view for editing your notes.
How Should I Write Up my Notes in PowerPoint?
How you write up your notes for your presentation is completely up to you. My opinion is that the best method is to write out a series of point form notes that remind you of your salient points and to act as a guide to keep you on track. This way, you don’t get off track, cover everything you want and maximize your potential interaction with the audience.
To me, so long as you know the content, this is the best way to present to your audience as it allows flexibility in your delivery to cater to the room. It his harder to adjust to your delivery if your presentation is fully scripted out.
- My opinion – point form notes are the best
- State only your salient points
- Use as a guide to stay on topic and to remember important points
- There are also plenty of reasons to fully type out your presentation script
While I prefer bullet point scripts when I present, your support crews would likely prefer that you stick to a fully written script with stage directions. This helps the show go smoothly for larger events where you have people helping the presenter in the delivery of their message. When the presenter follows a full script completely it helps everyone involved in that delivery stay on track and not miss queues such as when to change the slide, join in the conversation, or adjust an AV setting (like lighting).
As mentioned earlier, you could add stage directions in the PowerPoint notes section for the presenter or tech crew. Let’s talk a little bit about that now.
Use Your Notes for Stage Directions Too
Using the Notes section of PowerPoint, you can add in reminders for yourself (and anyone helping) about stage and technical directions. Perhaps you have an external video that you want queued up or a secondary source shown for a live demo. You can add this there to keep everyone on track. If you have multiple presenters delivering different parts of the presentation to your audience, you can also use the Notes section to direct who will be presenting each part.
[Square Brackets] are a common way to differentiate the spoken script words from the presentation directions. Italics also work well.
Highlights will show up in your handouts “Notes Page”, but they don’t generally show in other modes of PowerPoint. I advise sticking to Square Brackets, Italics or whatever you find already works with you and your support staff.
Again, how you choose to write your script in PowerPoint notes is up to you. As a presenter, I prefer bullet points. When I use PowerPoint to create hobby videos, I like to use a full written script. While supporting presenters as a media technician, I prefer a fully scripted notes section with stage directions.
You will have to find what works best for you. Now, let’s chat about how to actually use the notes section of PowerPoint when it comes to Presenting, Recording and printing Handouts.
How to use PowerPoint Notes – Presenting, Recording and Handouts
Now that we have the notes in our presentation, how do we use them? Microsoft gave us three effective ways to use these notes. You can use them as your speaker notes while you present to an audience, notes while you record a presentation, and as part of a handout for your audience. Let’s go through how to do all three of these uses for PowerPoint notes.
How to Present with Speaker Notes
Just like adding notes, presenting with speaker notes is extremely easy. All you have to do is present in Presenter view with two screens. This second screen could be your home monitor, a TV at the office or a projector at a convention center.
To make sure that your presentation is set up to take advantage of presenter view, go to “Slide Show”. From there, make sure that “Use Presenter View” is selected. When you go to show the presentation, the computer will automatically set up one screen with the presenter’s view and the other with the full screen slides.

You can change which screen the slides show on by changing the “Monitor”. The other will become your Presenter View screen.
A Quick Look at the Presenter View
This is a fantastic tool for both anyone who has to control a PowerPoint presentation in front of a live audience or anyone presenting to a virtual audience too. As a media technician I use this view all the time. It is great for following the scripts of the presenters and also works out great while running webcasts too. The only problem about this view is that you need two monitors to get the option to function.
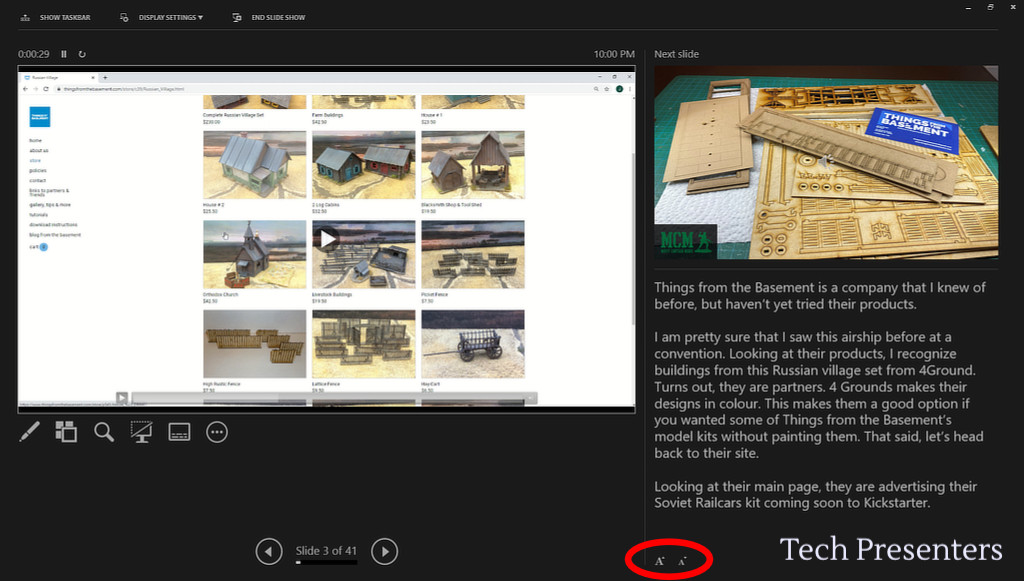
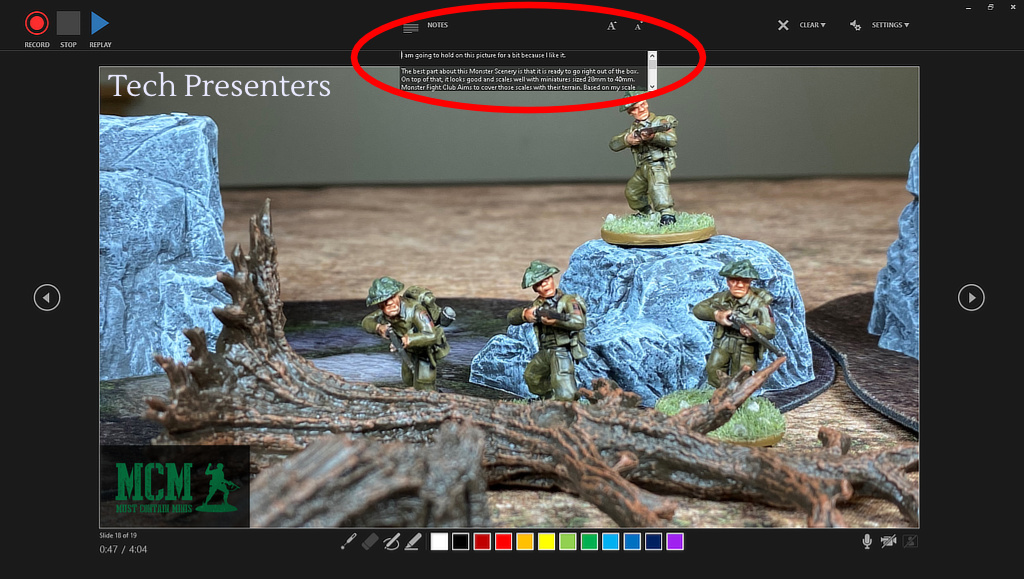
The screen shot above shows a PowerPoint deck that I turned into a video for a YouTube channel. This is the presentation showing in “Presenter View”. The slide is on the left, the next slide is on the right and under it is my script (or the notes section).
When you go to record your slide deck, you can also still access your notes. Let me demonstrate below.
How to Record with Speaker Notes
To record a presentation, you go to “Slide Show” followed by “Record Slide Show”.

There you will find the notes on a toggle button near the top middle of your screen.
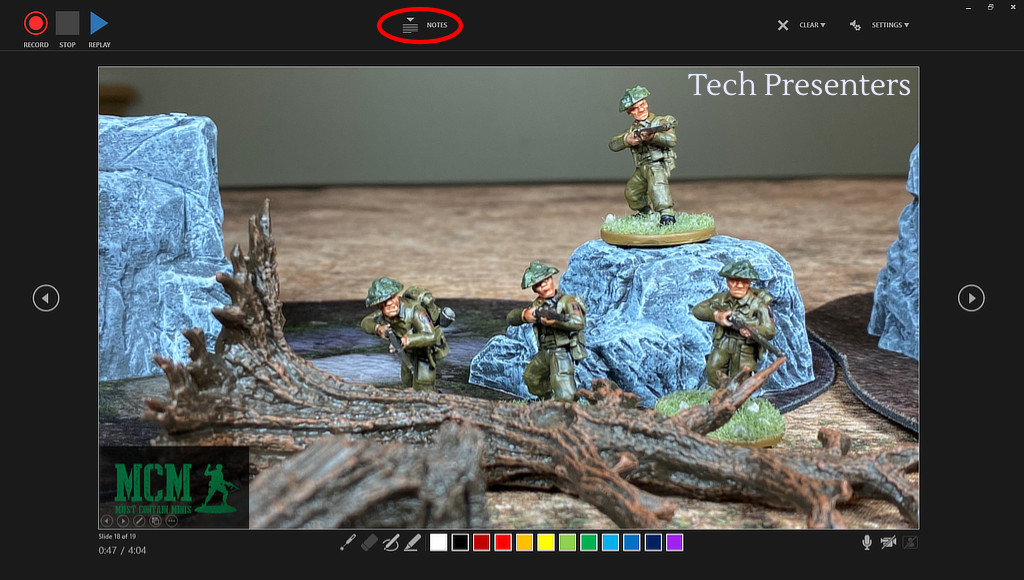
I find this one annoying to use because it is so small, but its location forces you to look almost directly into your laptop’s webcam (as most laptops have it located at the top of the computer screen). If you are recording video with you content in PowerPoint, this is a huge bonus! I can’t think of a better place to put the script other than right under the camera for giving the audience the impression that you are talking to them when you are reading your script.
How to Print Speaker Notes with Slides in PowerPoint
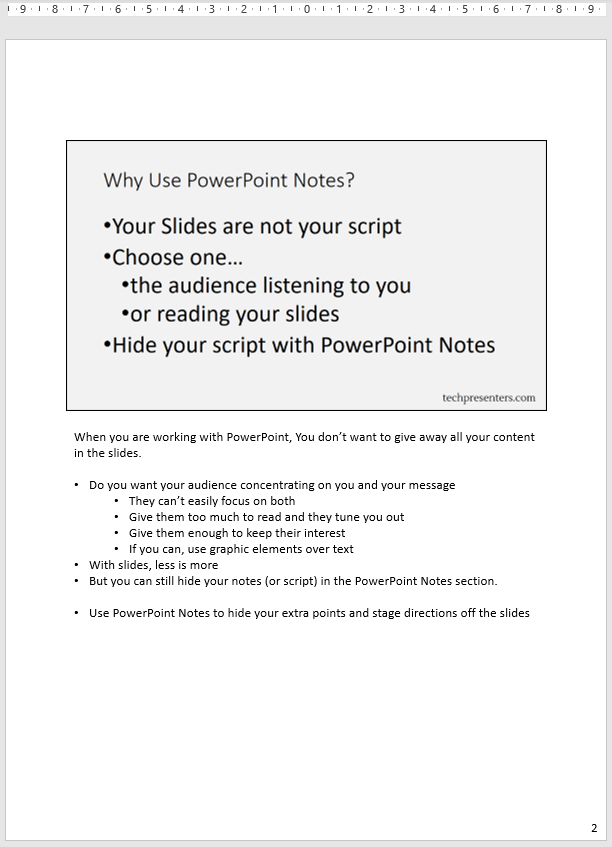
Even though we live in a paperless society, we still need to make printouts and hand outs. You can make them electronically (as PDFs) or physically on paper. One great way to access your notes is through the Notes Page. You can find this by clicking on “View” and then “Notes Page.”
If you have any presenters that want a printed copy of the notes for the podium (or technical or communications staff that also need the notes), I recommend that you print off the slide deck’s “Notes Page”.

To print your notes, select “File” and then “Print”. Here you will find a drop down for the slide layout. It likely says “Full Page Slides” to start. Change this to “Notes Pages”. You will see an image of the printer page further down in the article when I show you how to make fancy handouts with this same view.
Below is how the printout will look by default. Personally I find this layout very straight forward to work with.
“But wait, you mentioned I can turn this view into good looking handouts. How do I do that?”
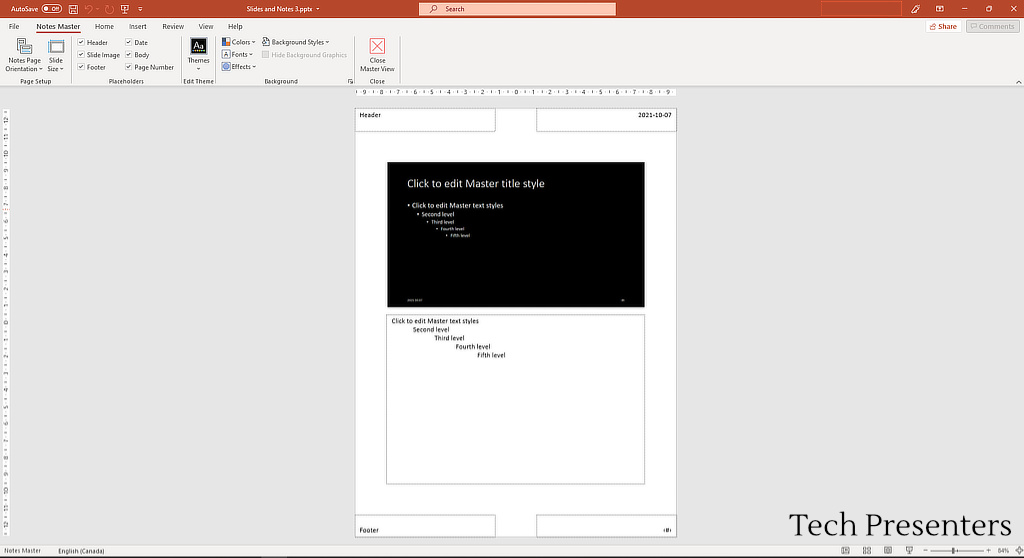
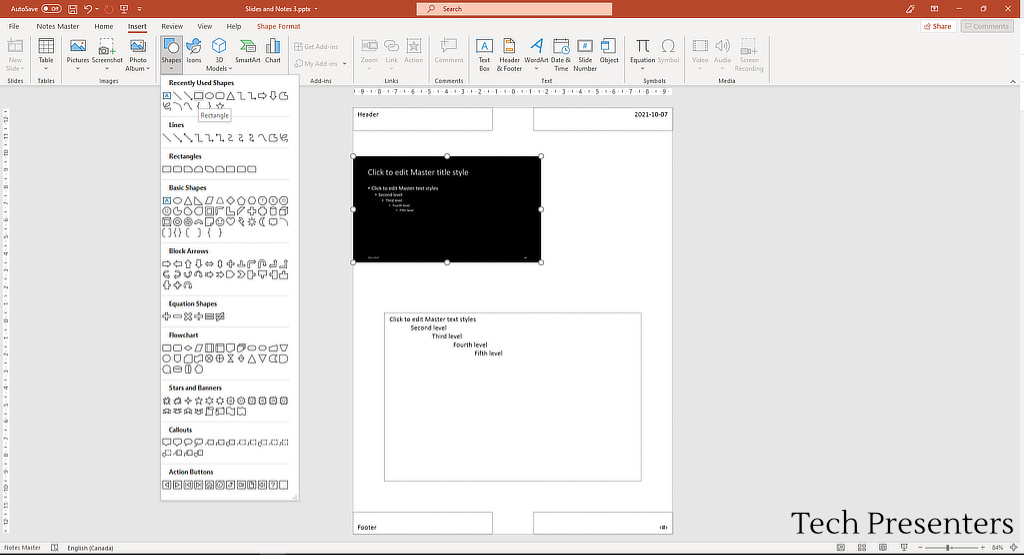
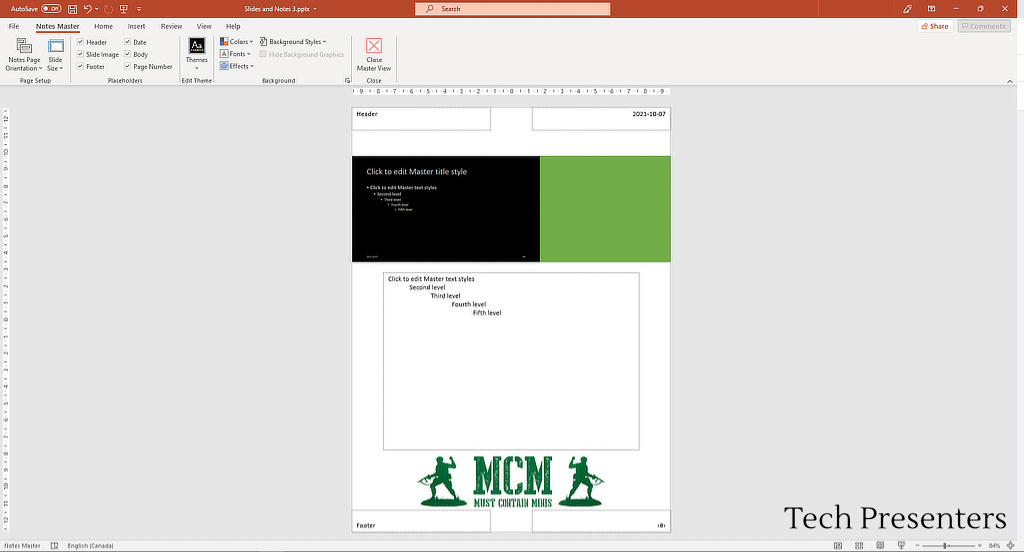
Creating Impressive Handouts with Notes – Altering the Layout of Handout Notes in PowerPoint
Now let’s look at how to take the notes (or script) of your presentation and turn that into a nice handout to give to your audience.
As a tip, I like to back up my files before I mess around with the layouts, but that is up to you on whether you do that or not.

To print, I went to “File” and then “Print”. On the print screen, I make sure that I choose the “Notes Pages” under the settings.
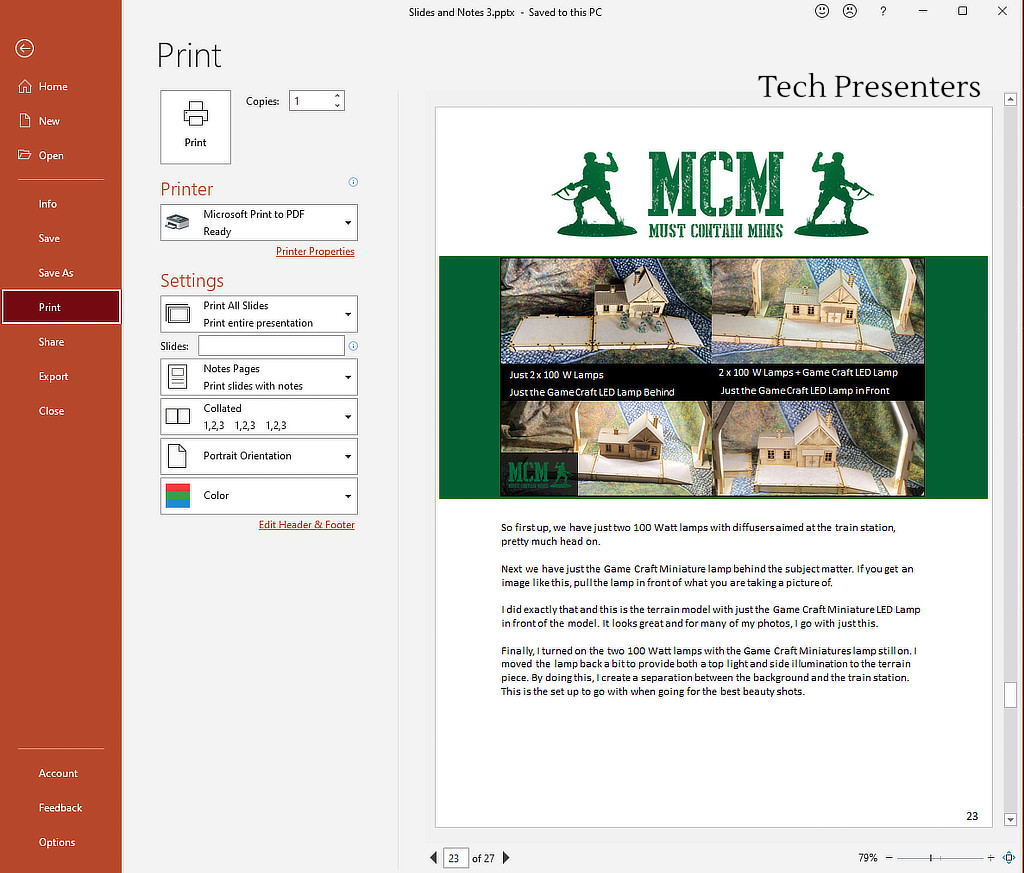
You can then print these handouts as PDF files or as physical copies.
Creating PowerPoint Handouts with Word
As with all things computers, there are usually multiple ways to doing things. Sometimes, those ways lead to different results but cover the same end goal. Here is another way to do handouts. This time, we utilize Microsoft Word.
You may want to back up your work before you go through with this just to be on the safe side.
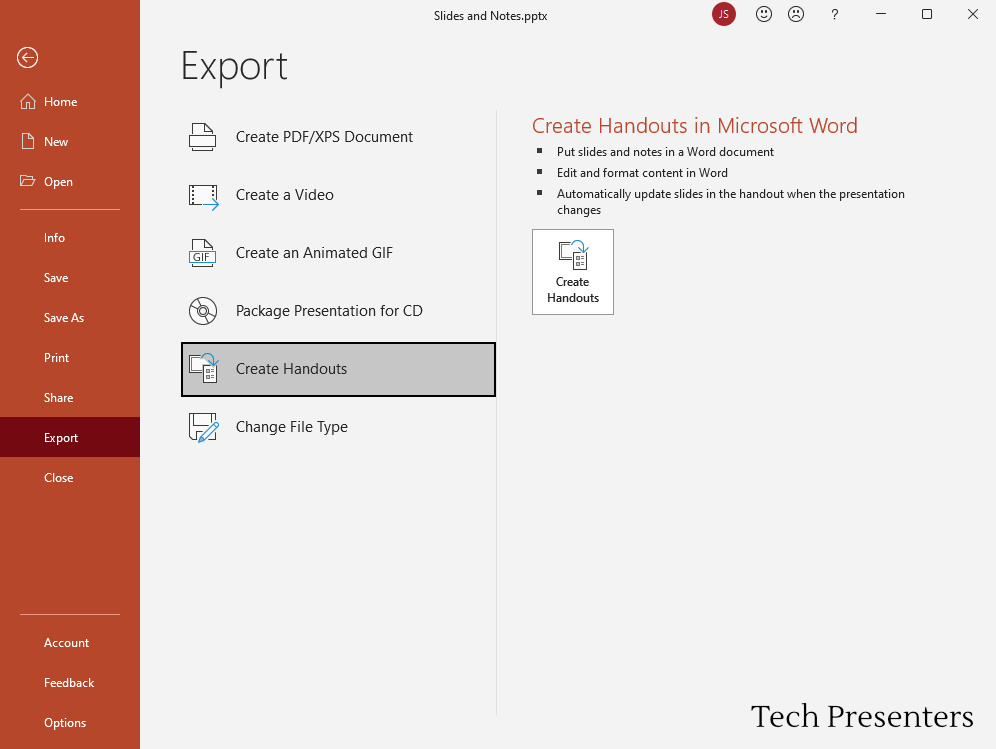
As a note, the function to export PowerPoint to Word takes a lot of memory. If you run into problems or see the message “PowerPoint couldn’t write to Microsoft Word,” restart your computer. Then run the Export with all other programs closed. If that still does not work, split the PowerPoint into two separate presentations. One with the first half of the slides and the other with the second half. Export both of those presentations and then combine them in Word.
Relevant Links…
In this post, I made reference a few times to my hobby videos On top of Tech Presenters, I run another website focused on tabletop gaming. That website also has a YouTube channel connected to it. I made all of my early videos on that channel using PowerPoint. Now I use video editors instead, but it is surprising how much you can do with PowerPoint.
If you are interested in video editors, check out my article “The Best Free Video Editors Out There For the PC”. You can also find more PowerPoint Tips right here on Tech Presenters. One article that I would like to direct your attention to is “The Hottest PowerPoint HotKeys for Presenters“. Be sure to check that article out for some HotKeys that could help you present better in front of an audience.
Turning back to this article, the PowerPoint files that I screen captured are from the videos listed below. I made them using PowerPoint and even wrote my scripts into the notes section of the program.
- LED Lamp Review for Painting, Building and Photographing Miniatures – Lamp by GameCraft Miniatures
- 28mm WW2 Soviet Train Station Review – MDF Terrain by Things from the Basement soon on Kickstarter
- Monster Scenery Terrain Review – Broken Ground – Pre-painted terrain for miniature gaming and RPGs
On top of these videos, I also have a related Website called Must Contain Minis.
For those wondering, I am using Office 365 on Windows 10.
Now, let’s finish up this article.
Bringing it Together…
In this article, we went over how to add notes to PowerPoint. Not only that, but we went further and also discussed how to use the notes during presentations, for recording and for printing off handouts.
As a presentation support professional, I find coupling my slides with notes extremely handy. As a presenter, these notes help me stay on track and to make sure that I cover all of the important points that I wanted to make. Knowing how to use these notes, and how to get the most out of them, really helps in delivering the best presentations that you can.
Personally I like to keep back up files and older versions of my files in case I run into any problems. In general, I am pretty cautious in my approach and there is not harm in keeping multiple files. Just make sure that you name them well and work on the newest version. I figured I would leave that reminder here. If you are playing around with the layout of your notes page or messing around with what appears on them, it might be a good idea to keep a back up to go to in case things don’t work as intended.
Until next time, Happy Presenting Everyone!!!


Pingback: How to Make Bullet Points Show 1 by 1 in PowerPoint - Tech Presenters